I wanted to make something for my son’s new apartment that is masculine and functional. When I came across these MDF Kaisercraft coasters I knew just what to do!

To cover the backs and edges of the coasters, I chose Kaisercraft paint in Sage so it would blend in with the organic feel of my photos. I chose a variety of scenic photos I had taken in our area giving them a bit of a homey feeling for my son.
 Once I had attached the photos to the coasters, I applied Kaisercraft rubons with encouraging quotes giving each coaster a bit more meaning, and a little message from mom!
Sugar & Spice
I just love that my mom saved the entire series of these photos, pout and all!
I chose to use a couple of different lines helping to keep the vintage feel of the photos, yet bring out the pop of green and orange in the dress and bow.
The flowers are homemade by using a blend of Kaisecraft lace, flowers, and brads.
The stitched circle was inspired by the stitching on the front of the dress.
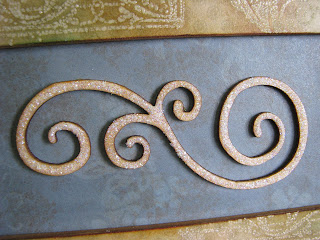
To create the flourishes, I broke a wooden Kaisercraft flourish in to separate parts. I covered each piece with copper metallic paint, then rubbed with Kaisercraft Slate ink to give more of a rustic vintage feel.
For You
This would make a lovely card for any celebration…birthday, thinking of you, and even wedding!
The flowers were fussy cut from pattern paper and tucked in for a splash of color. I combined a the outer flourish/box portion of a journaling rubon with a sentiment rubon to create the sentiment block for my card. After applying the rubons to my paper, I cut around the edge of the image for a more formal look. A splash of pearls adds to the elegance of the card.
Best Wishes
Once again, I applied some fussy cut flowers for a splash of color. Each layer of the sentiment block is adhered with dimensional foam. The string of Kaisercraft pearls, along with the large pearls brad add a bit of texture and elegance to the card.
Through the Pages of Time
I had the most fun creating this MDF clock from Kaisercraft!! I chose patterns with a neutral color so my photos would pop.
Once the paper for the top of the clock had been adhered and had dried, I grabbed my Kaisercraft stamps, clear embossing powder, and an assortment of inks. Because I wanted the stamped image to be faint, I used a clear embossing pad to stamp the images. I also wanted a more distressed look to the image so I chose to emboss with a thicker powder. After the images had been embossed, I rubbed my inks over the embossed area drawing out the image. I chose to use a variety of colors giving the entire project a hint more color.


These Kaisercraft wood flourishes are gorgeous. Rather than adding color, I preferred to leave them in they natural state and added a layer of clear stickles over the top for a bit of sophistication.

I just love the fun bright colors of this line!! They remind me of my sister-in-law….fun, cheery, always wearing a bright smile!
 I’ve been saving this quote for just the right time, and this glittery teapot paper was the perfect fit!! I cut the teapot, cup, and cake from the pattern paper. The flowers were created by adding several layers of my Kaisercraft flowers and bunching them together.
The colors and patterns of this line are ideal for my outdoorsy teenage boy photos!

Whether I am looking for sentiments, titles, or embellishments I know I can find a good assortment in my Kaisercraft rubon stash!! This layout is no exception !! I applied rubon stitching, borders, and title! I created the fun circle embellishments by applying my rubons to cardstock and cutting around the image. By adhering them with pop dots, I was able to give them some dimension. To create texture for my masculine layout, I cut stars from a variety of mediums such as cardboard, corduroy fabric, and a scrap of denim from hubby’s pants.


To create my title, I applied a coat of Kaisercraft Slate ink to the Kaisercraft neutral chipboard letters. Once the ink dried, I dry brushed Kaisercraft White paint over a piece of mesh to produce the distress checkered look.

To My Friend
I am so fortunate to have such incredible and amazing friends. This card is a salute to them, for they have most certainly touched my heart forever!!

Thanks for stopping by!!


3 comments:
Jodi this is amnazing how lucky is your son the coastera are Amazing as u if I could have mny store your are such a designer unique beautiful I am speechless to say the least.
I would be so lucky to have anything made by you the clock is sensational amd layout cards splendid
Start feeling better
Jodi, you did totally amazing on all the projects. I absolutely love the layouts and cards. The clock and coasters are over the top and should be appreciated by anyone you give them to.
I love your work and thanks for being my friend.
Jodi I am really liking all your los and cards, I love your use of color but how they don't scream at you. Great work!
Post a Comment